

Scala il tuo sviluppo visivo a livello globale senza codice backend.
Webflow è la piattaforma principale per lo sviluppo visivo, ma la localizzazione nativa può essere complessa e costosa. MultiLipi si integra direttamente nell'architettura di Webflow tramite una singola iniezione di script, trasformando istantaneamente le tue pagine statiche e le collezioni CMS in un infrastruttura multilingue con indicizzazione SEO completa.
Questa guida illustra il processo di integrazione utilizzando il Codice personalizzato funzionalità.
1. Prerequisiti di distribuzione
Prima di iniziare, assicurati che il tuo ambiente soddisfi i requisiti:
Piano del sito Webflow
Devi essere su un Piano del sito Basic (o superiore) per sbloccare la funzionalità "Codice personalizzato".
Chiave API MultiLipi
Individua questo nella tua Dashboard sotto Impostazioni > Generali.
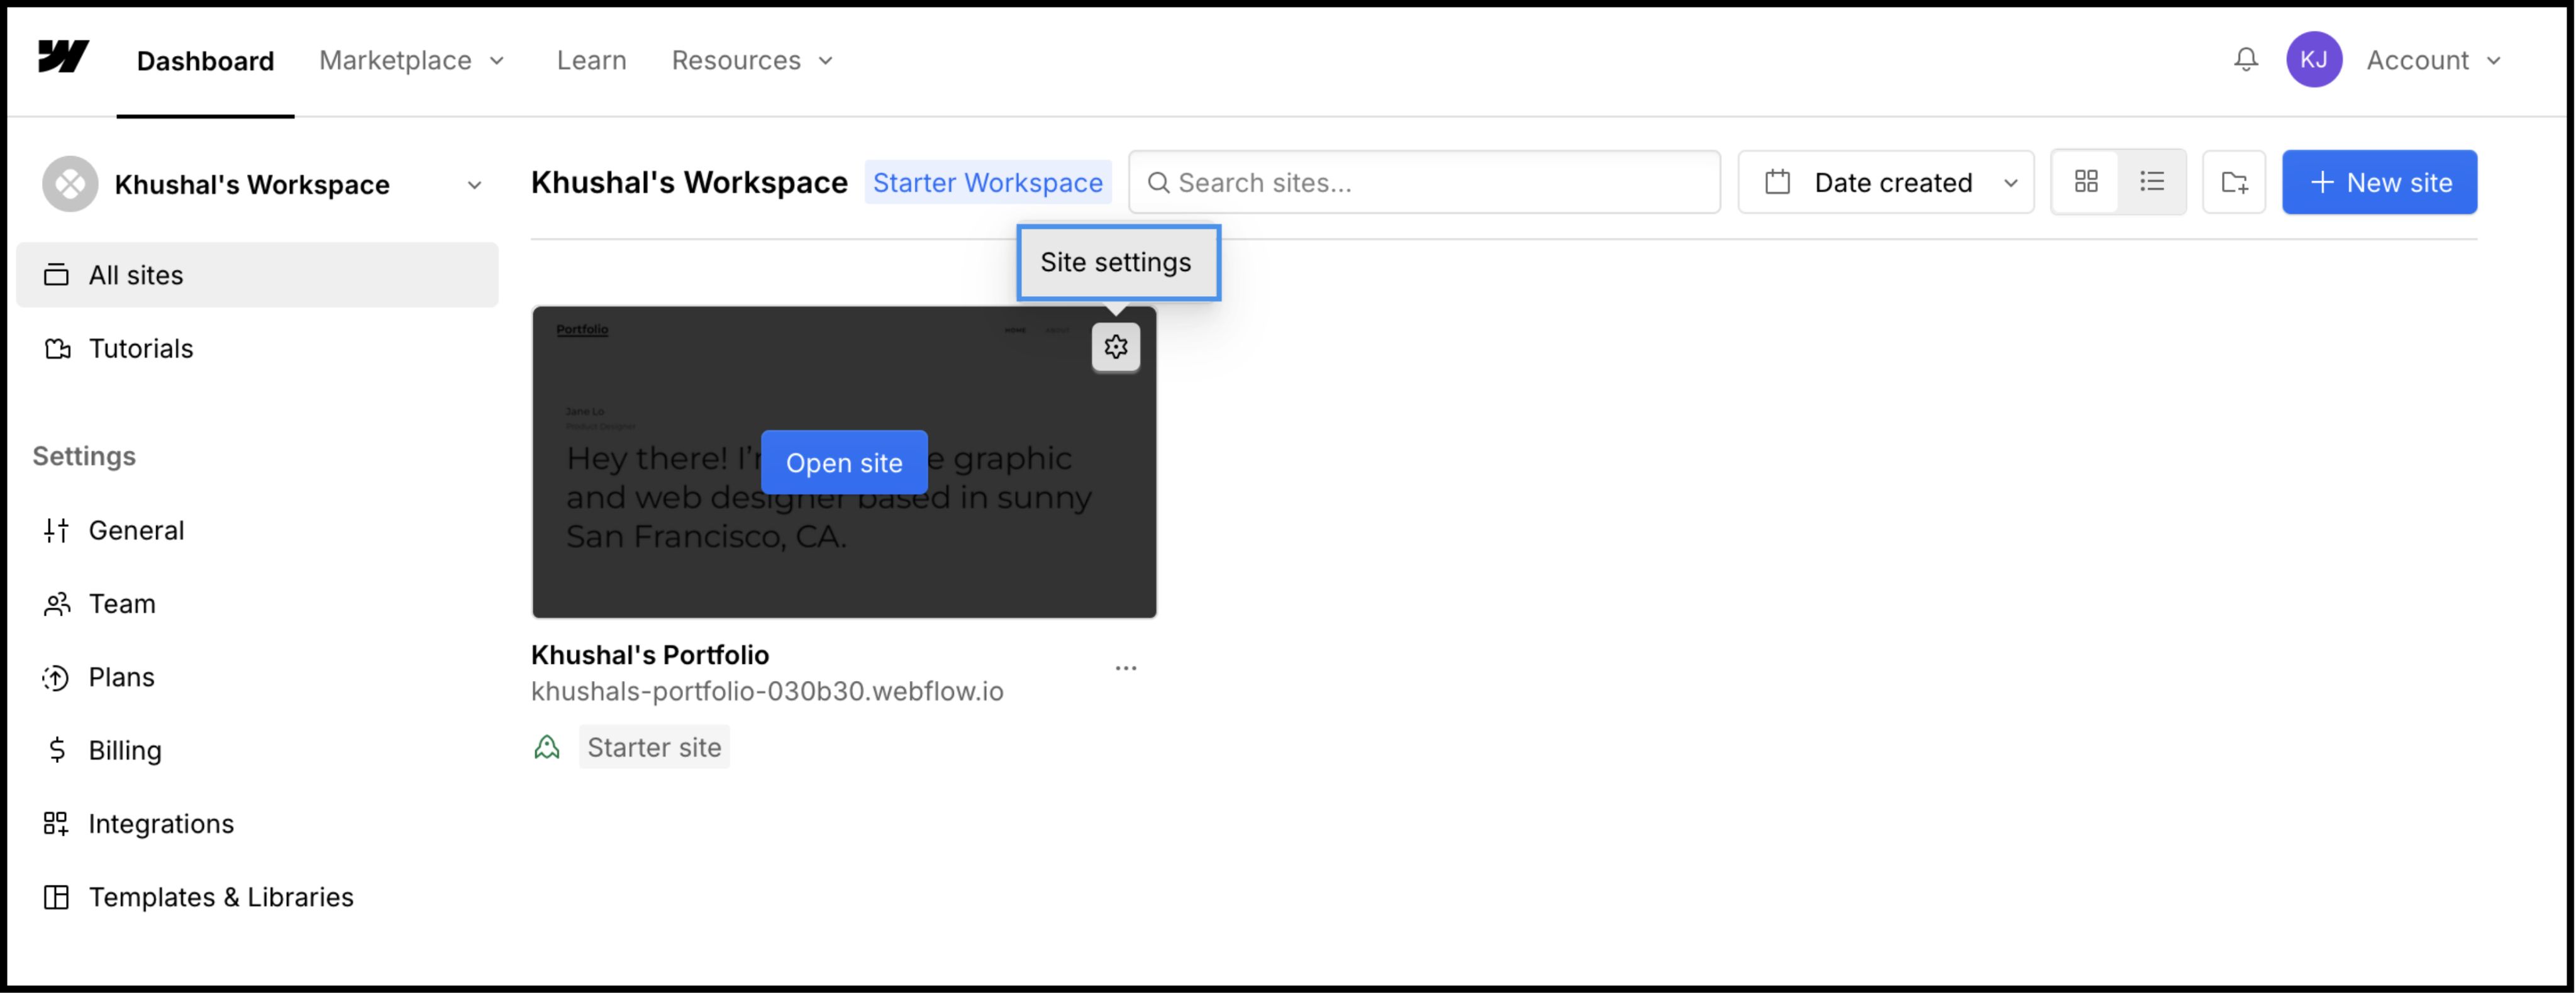
2. Passaggio 1: Accesso all'architettura del sito
Inietteremo il motore di traduzione nell'intestazione globale per garantire che persista in tutte le pagine e nei modelli CMS.
- 1
Accedi al tuo Dashboard Webflow.
- 2
Individua la scheda del tuo progetto e fai clic sull'icona Impostazioni (⚙️) (o seleziona Impostazioni del sito dal menu Designer).
- 3
Naviga al Codice personalizzato scheda nella barra di navigazione in alto.
3. Passaggio 2: Inietta lo script dell'infrastruttura
- 1
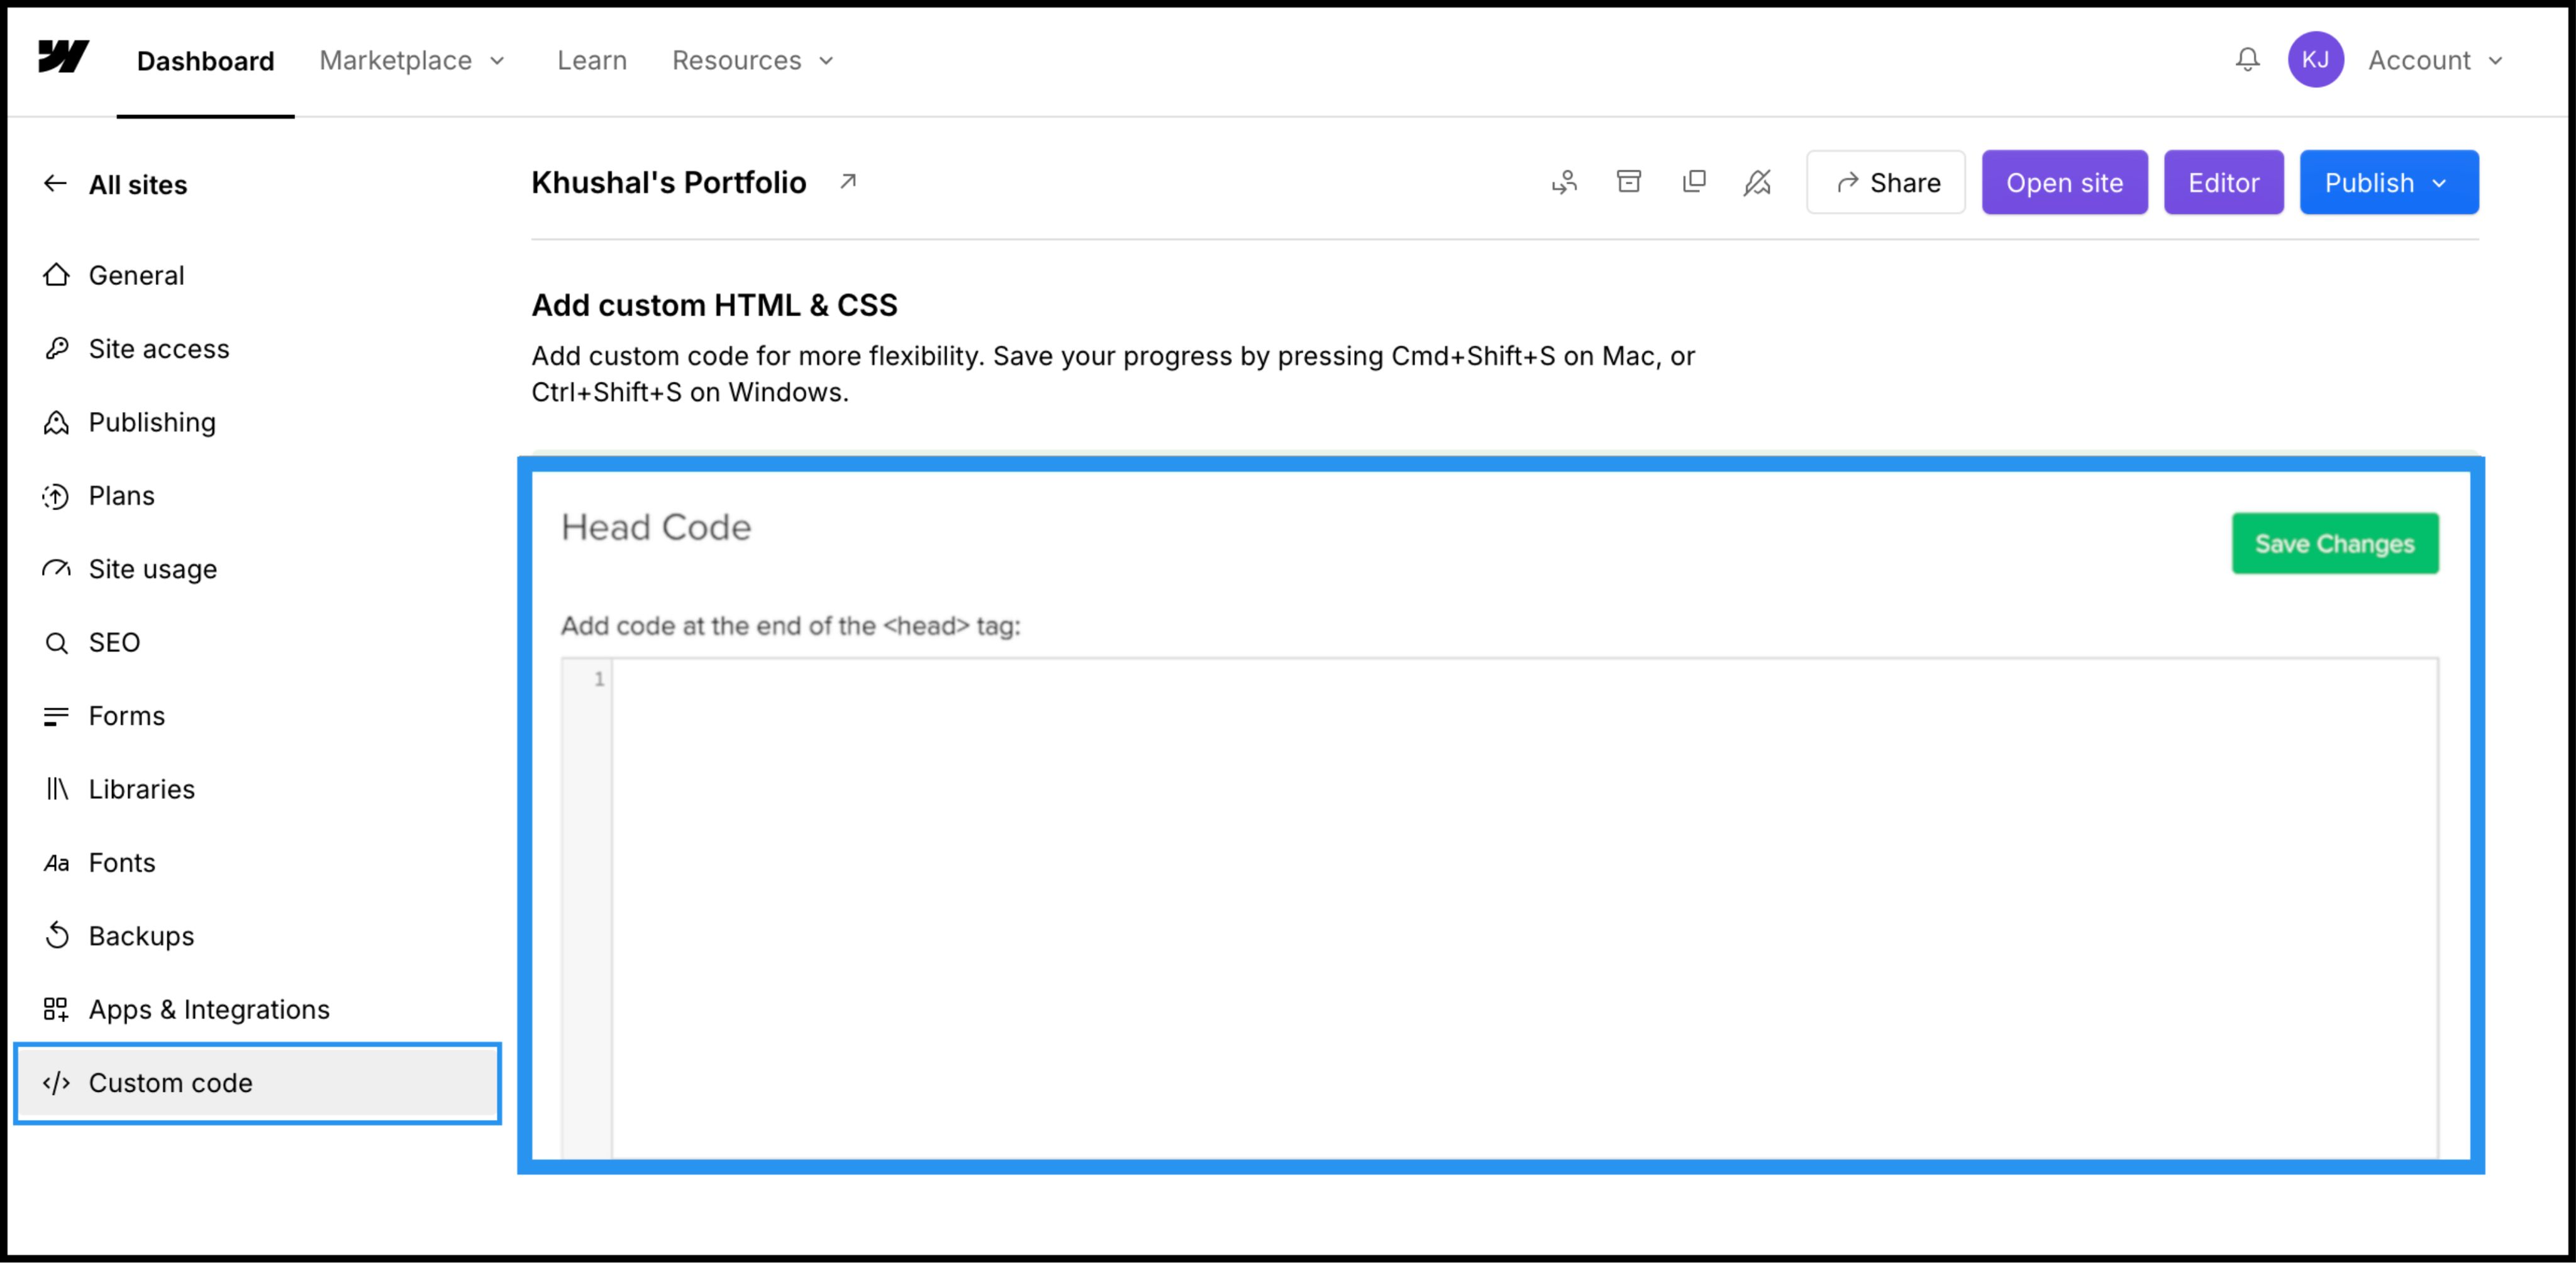
Scorri verso il basso fino al campo etichettato "Codice Head".
- 2
Nota: Non inserire questo nel "Codice piè di pagina", poiché ritarderà il caricamento della traduzione e causerà un "flash di contenuto non tradotto".
Azione: Incolla lo script di connessione
Incolla il seguente script di connessione nel campo:
<script
  src="https://multilipistorage.blob.core.windows.net/static/js/page_translations.js"
  key="YOUR_API_KEY_HERE"
></script>
⚠️ Configurazione Critica
- •Sostituisci
LA_TUA_CHIAVE_API_QUIcon la chiave API effettiva copiata dalla tua dashboard MultiLipi. - •Fai clic sul verde Salva Modifiche pulsante nell'angolo in alto a destra.
4. Passaggio 3: Distribuzione e verifica
Webflow non esegue codice personalizzato nella vista Designer. Devi pubblicare per vedere il motore in azione.
Pubblica
Fai clic sul blu Pubblica pulsante e seleziona il tuo dominio di produzione (o .webflow.io dominio di staging).
Verifica
Apri il link live.
Controllo Visivo
Il Language Switcher dovrebbe apparire nell'angolo in basso a sinistra.
Controllo CMS
Naviga in una pagina di raccolta CMS (ad es. /blog/post-1) e cambia lingua per assicurarti che il contenuto dinamico venga tradotto correttamente.
Protocollo di Risoluzione Problemi
- •Switcher mancante? Conferma di aver pubblicato il sito dopo aver salvato il codice.
- •Controllo piano: Assicurati che il tuo piano di hosting Webflow sia attivo; i siti di staging gratuiti spesso limitano l'esecuzione di codice personalizzato su domini personalizzati.
5. Ottimizzazione e stile
Una volta distribuito, MultiLipi funziona silenziosamente in background.
Integrità del Design
Poiché scambiamo solo nodi di testo, le tue interazioni Webflow (IX2) e le animazioni di scorrimento rimangono perfettamente intatte.
Personalizzazione dello Switcher
Puoi riposizionare lo switcher utilizzando le impostazioni della nostra Dashboard o sovrascrivere il suo CSS per adattarlo alla tipografia specifica del tuo sito.
Automazione SEO
Generiamo automaticamente le sitemap.xml voci e i hreflang tag per il tuo progetto Webflow, assicurandoti di posizionarti nei risultati di ricerca globali senza lavoro manuale di SEO.